BLDC driver 3PWM - BLDCDriver3PWM
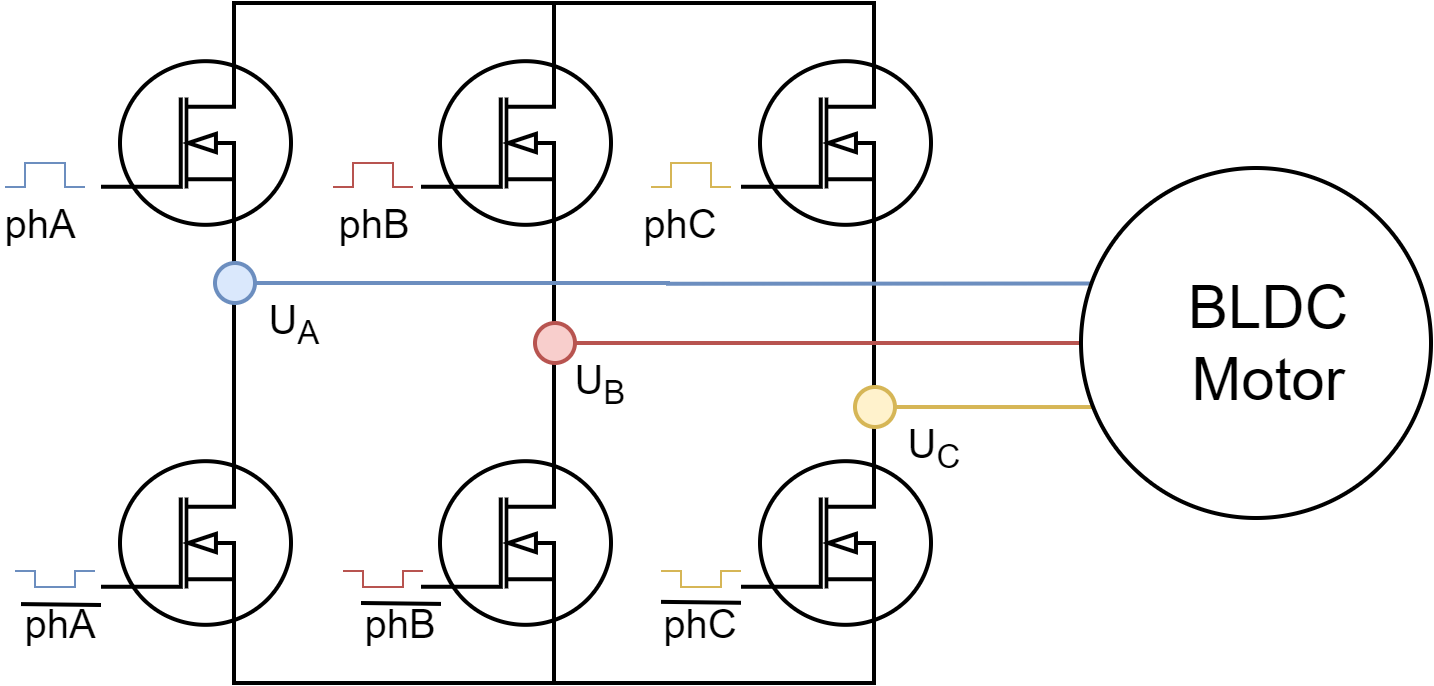
This is the class which provides an abstraction layer of most of the common 3PWM bldc drivers out there. Basically any BLDC driver board that can be run using 3PWM signals can be represented with this class. Examples:
- Arduino SimpleFOCShield
- Arduino SimpleFOC PowerShield
- L6234 breakout board
- HMBGC v2.2
- DRV830x ( can be run in 3pwm or 6pwm mode )
- X-NUCLEO-IHM07M1
- etc.

Step 1. Hardware setup
To create the interface to the BLDC driver you need to specify the 3 pwm pin numbers for each motor phase and optionally enable pin.
//  BLDCDriver3PWM( int phA, int phB, int phC, int en)
//  - phA, phB, phC - A,B,C phase pwm pins
//  - enable pin    - (optional input)
BLDCDriver3PWM driver = BLDCDriver3PWM(9, 10, 11, 8);
Additionally this bldc driver class enables the user to provide enable signal for each phase if available. SimpleFOClibrary will then handle enable/disable calls for each of the enable pins and if using modulation type Trapezoidal_120 or Trapezoidal_150 using these pins the library will be able to set high impedance to motor phases, which is very suitable for Back-EMF control for example:
//  BLDCDriver3PWM( int phA, int phB, int phC, int enA, int enB, int enC )
//  - phA, phB, phC - A,B,C phase pwm pins
//  - enA, enB, enC - enable pin for each phase (optional)
BLDCDriver3PWM driver = BLDCDriver3PWM(9, 10, 11, 8, 7, 6);
Step 2.1 PWM Configuration
// pwm frequency to be used [Hz]
// for atmega328 fixed to 32kHz
// esp32/stm32/teensy configurable
driver.pwm_frequency = 50000;
⚠️ Arduino devices based on ATMega328 chips have fixed pwm frequency of 32kHz.
Here is a list of different microcontrollers and their PWM frequency and resolution used with the Arduino SimpleFOClibrary.
| MCU | default frequency | MAX frequency | PWM resolution | Center-aligned | Configurable freq |
|---|---|---|---|---|---|
| Arduino UNO(Atmega328) | 32 kHz | 32 kHz | 8bit | yes | no |
| STM32 | 50kHz | 100kHz | 14bit | yes | yes |
| ESP32 | 40kHz | 100kHz | 10bit | yes | yes |
| Teensy | 50kHz | 100kHz | 8bit | yes | yes |
All of these settings are defined in the drivers/hardware_specific/x_mcu.cpp/h of the library source.
Step 2.2 Voltages
Driver class is the one that handles setting the pwm duty cycles to the driver output pins and it is needs to know the DC power supply voltage it is plugged to. Additionally driver class enables the user to set the absolute DC voltage limit the driver will be set to the output pins.
// power supply voltage [V]
driver.voltage_power_supply = 12;
// Max DC voltage allowed - default voltage_power_supply
driver.voltage_limit = 12;

This parameter is used by the BLDCMotor class as well. As shown on the figure above the once the voltage limit driver.voltage_limit is set, it will be communicated to the FOC algorithm in BLDCMotor class and the phase voltages will be centered around the driver.voltage_limit/2.
Therefore this parameter is very important if there is concern of too high currents generated by the motor. In those cases this parameter can be used as a security feature.
Step 2.3 Initialisation
Once when all the necessary configuration parameters are set the driver function init() is called. This function uses the configuration parameters and configures all the necessary hardware and software for driver code execution.
// driver init
driver.init();
Step 3. Using BLDCDriver3PWM in real-time
BLDC driver class was developed to be used with the SimpleFOClibrary and to provide the abstraction layer for FOC algorithm implemented in the BLDCMotor class. But the BLDCDriver3PWM class can used as a standalone class as well and once can choose to implement any other type of control algorithm using the bldc driver.
FOC algorithm support
In the context of the FOC control all the driver usage is done internally by the motion control algorithm and all that is needed to enable is is just link the driver to the BLDCMotor class.
// linking the driver to the motor
motor.linkDriver(&driver)
Standalone driver
If you wish to use the bldc driver as a standalone device and implement your-own logic around it this can be easily done. Here is an example code of a very simple standalone application.
// BLDC driver standalone example
#include <SimpleFOC.h>

// BLDC driver instance
BLDCDriver3PWM driver = BLDCDriver3PWM(9, 5, 6, 8);

void setup() {

  // pwm frequency to be used [Hz]
  driver.pwm_frequency = 50000;
  // power supply voltage [V]
  driver.voltage_power_supply = 12;
  // Max DC voltage allowed - default voltage_power_supply
  driver.voltage_limit = 12;

  // driver init
  driver.init();

  // enable driver
  driver.enable();

  _delay(1000);
}

void loop() {
    // setting pwm
    // phase A: 3V, phase B: 6V, phase C: 5V
    driver.setPwm(3,6,5);
}
An example code of the BLDC driver with three enable pins, one for each phase. This code will put one phase at the time to the high-impedance mode and pun 3 and 6 Volts on the remaining two.
// BLDC driver standalone example
#include <SimpleFOC.h>

// BLDC driver instance
BLDCDriver3PWM driver = BLDCDriver3PWM(9, 10, 11, 8, 7, 6);

void setup() {

  // pwm frequency to be used [Hz]
  driver.pwm_frequency = 50000;
  // power supply voltage [V]
  driver.voltage_power_supply = 12;
  // Max DC voltage allowed - default voltage_power_supply
  driver.voltage_limit = 12;

  // driver init
  driver.init();

  // enable driver
  driver.enable();

  _delay(1000);
}

void loop() {
    // phase (A: 3V, B: 6V, C: high impedance )
    // set the phase C in high impedance mode - disabled or open
    driver.setPhaseState(_ACTIVE , _ACTIVE , _HIGH_Z); // _HIGH_Z or _HIGH_IMPEDANCE
    driver.setPwm(3, 6, 0);
    _delay(1000);

    // phase (A: 3V, B: high impedance, C: 6V )
    // set the phase B in high impedance mode - disabled or open
    driver.setPhaseState(_ACTIVE , _HIGH_IMPEDANCE, _ACTIVE);
    driver.setPwm(3, 0, 6);
    _delay(1000);

    // phase (A: high impedance, B: 3V, C: 6V )
    // set the phase A in high impedance mode - disabled or open
    driver.setPhaseState(_HIGH_IMPEDANCE, _ACTIVE, _ACTIVE);
    driver.setPwm(0, 3, 6);
    _delay(1000);
}
